
wxPython
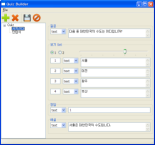
GUI prototyping을 할 필요가 있어서 wxPython을 사용해 보았다. MacOSX 버전은 Carbon API를 사용하기 때문에 32-bit 모드에서만 동작을 해서, windows 버전으로 개발을 했다.
Tutorial과 demo code, 문서들이 잘 되어 있어서 처음 learning curve는 낮은 편이었다.
세밀한 제어가 가능했지만, Designer없이 화면 layout을 구성하는게 번거로운 단점이 있었다. 결과물의 품질은 native win32 coding으로 했을때와 별 차이가 없어 보였다.
만든 프로그램은 py2exe를 이용하여 실행파일로 만들어 배포할 수 있다.
from distutils.core import setup
import py2exe

import sys; sys.argv.append('py2exe')

py2exe_options = dict(
                      ascii=False,  # Exclude encodings
                      excludes=['_ssl',  # Exclude _ssl
                                'pyreadline', 'difflib', 'doctest',
                                'optparse', 'pickle', 'calendar'],  # Exclude standard library
                      dll_excludes=['msvcr71.dll'],  # Exclude msvcr71
                      packages=['mako.cache'],
                      compressed=True,  # Compress library.zip
                      )

setup(name='Test,
      version='0.5',
      description='Test,
      author='jmjeong',

      console=['test.py'],
      options={'py2exe': py2exe_options},
      )
output은 exe와 library등으로 구성되어 있는데, NSIS를 이용하여 압축하여 하나의 실행파일로 만들 수 있다. 4M 크기의 최종 결과물이 만들어졌다. 프로그램을 수행하면, 자동으로 압축을 해제하고 실행하기 때문에 처음 실행 시간이 약간 걸린다.
!define py2exeOutputDirectory 'dist'
!define exe 'test.exe'

; Comment out the "SetCompress Off" line and uncomment
; the next line to enable compression. Startup times
; will be a little slower but the executable will be
; quite a bit smaller
;SetCompress Off
SetCompressor lzma

Name 'qb'
OutFile ${exe}
SilentInstall silent
;Icon 'icon.ico'

Section
    InitPluginsDir
    SetOutPath '$PLUGINSDIR'
    File '${py2exeOutputDirectory}*.*'

    GetTempFileName $0
    DetailPrint $0
    Delete $0
    StrCpy $0 '$0.bat'
    FileOpen $1 $0 'w'
    FileWrite $1 '@echo off$r$n'
    StrCpy $2 $TEMP 2
    FileWrite $1 '$2$r$n'
    FileWrite $1 'cd $PLUGINSDIR$r$n'
    FileWrite $1 '${exe}$r$n'
    FileClose $1
    nsExec::Exec $0
    Delete $0
SectionEnd
Written on February 25, 2012